BLMA Models
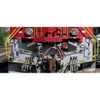
BLMA 14 N Scale Modern GE Locomotive Cut Levers (2 Pair)
- SKU:
- BLM14
- MPN:
- 14
- Weight:
- 0.10 LBS
- Shipping:
- Calculated at Checkout
Description
Cut Levers (or 'Cut Bars') are used to vertically lift or pull the coupler pin on all rolling stock. Simply put, these long, horizontal levers give train crews the leverage needed to open or close a coupler.
This style of Cut Lever is common on many GE diesel locomotives produced during and beyond the early-mid 1970's.
Model Description:
Chemically-etched in stainless steel for durability and scale fidelity, our General Electric-type cut levers follow a similar design to our EMD Modern Cut Levers, requiring minor bending. Included in each set are four cut levers, mounting pins, and a drill template.
Model Features:
? Etched in .006" Stainless Steel
? Accurate Dimensions
? Razor Sharp Etching
? Mounting Pins Included
Instructions:
1. Remove cut levers from etching frame with a sharp hobby knife blade.
2. Bend the middle ?U? section perpendicular to both outside handles of the cut lever (see prototype photo to the left). To make this bend, we suggest grasping one side of the ?U? with toothless pliers and grasping one side of the cut lever with another pair of pliers. With little force, rotate one hand 90 degrees to make the ?U? perpendicular to the outside of the cut lever.
3. Complete step two for both sides of the cut lever.
4. Next, notice that the ends of the cut levers have small nubs that bend outwards at the very bottom of the handles. For a more realistic look, bend these small nubs 90 degrees so they are facing the opposite direction of the ?U? (which would be toward the locomotive, not away from it).
6. Remove the mounting pins supplied with the cut levers and use the holes in the etched fret as a drilling template. Simply tape the drilling template to the front of the locomotive at the proper height (consult prototype photos) and drill through the holes using a #80 drill.
7. Loop four of the mounting pins onto the cut lever, add a dab of glue on the holes drilled in step six and mount the cut lever to the model.
8. Paint as appropriate.
View AllClose
Additional Information
Type of Item: |
Parts & Accessories |
Brand: |
BLMA Models |
Manufacturer: |
BLMA Models |
Assembly Status: |
Unassembled Kit |
Scale: |
1:160 |
Gauge: |
N |
eBay Category: |
|
Control: |
|
Age Level: |
|
Time Period Manufactured: |
|
Rail System: |
|
MPN: |
|
Control System: |
|
Country/Region of Manufacture: |
|
Grade: |
|
Power Type: |
|
Year Manufactured: |
|
Corporate Roadname: |
|
Vintage: |
|
Replica of: |
|
Color: |
|
Theme: |
|
Wheel Configuration: |
|
Material: |
|
Features: |
|
Road Name: |


